Friday, August 26, 2005

012 Lucky Seven

My wife, Stacey gave this model to me as a gift for my birthday. It is part of the E2X Series of Estes model rockets. I have built three of these type of model rockets and they are extremely easy to build and require no paint. Despite the lack of skill needed to build these rockets they are usually good fliers.

The rocket is a 1:50 scale model of the Lucky Seven rocket built by Acceleration Engineering for the X-Prize competition . It flies on the Estes A10-3T mini motor.

Manufacturer - Estes
Stages - 1
Weight - 1.5 oz.
Length - 7.9 in.
Diameter - 1.637 in.
Fin Material - Plastic
Recovery - 12 in. Parachute
Current Status - Active

Go Box Launch Controller

I needed a new launch controller with some umph so I began researching solutions. I came across this handy little controller from Pratt Hobbies. It is small, affordable, and packs a 12 volt punch to light any igniter or cluster. It is well constructed and comes with 25 feet of cable to keep you at a safe distance from the pad. Best of all it's only $29.95!

this is an audio post - click to play

Wednesday, August 24, 2005

008 Shuttle Express

This is another of the Estes E2x Series of model rockets. It is a very easy model to build and looks great when finished The body tubes come prefinished with decals that cover the entire body tube. You cannot see any lines from the tube. The shuttles look pretty tough and should fly well.

This rockets performs just like any other except it "tows" the shuttles with little hooks. When the rocket reaches apogee the inertia of the shuttles releases them from the rocket body. This rocket might have been a cinch to build but it is indicative of why I am a "born again rocketeer", it's fun!

Manufacturer - Estes
Stages - 1
Weight - 3.2 oz.
Length - 17.69 in.
Diameter - 1.35 in.
Fin Material - Plastic
Recovery - 12 in. Parachute and Glider
Current Status - Active

Tuesday, August 23, 2005

The Rocket Workshop


Ok, so this isn't a workshop used exclusively for building model rockets but it's pretty perfect anyway. I have always liked building and repairing things so I have had this workshop since I moved into my home in 2000. I have made a few modifications though to make it more rocket friendly.

First of all I had to clean off the workbench. If there is anything I learned from working on jet engines for six years is that a clean work space is a productive workspace. I put everything in it's place and made some room to spread my projects out. I also made some room for basic rocket building supplies. Here is a list of the tools in my workshop that I use to build rockets and rocket building and launching equipment;
  • Dremel Scrollsaw
  • Small Drill Press
  • Jig Saw
  • Miter Saw
  • Orbital Sander
  • Clamps
  • Dremel
  • Cordless Drill
I have just enough space to work at my bench because I have a small pop-up camper parked in my garage. But you don't need a lot of space unless you are going to be painting in your garage, which I don't recommend. The basic tools listed above will help you make better rockets and the various tools and launch equipment listed on this blog.

Monday, August 22, 2005

New Launch Pad


I have only been into model rocketry for a month and I am already sick of crawling on the ground to connect my ignition leads to the motor. The EstesPort-A-Pad just isn't cutting it and I am ready to try building larger rockets and I don't want to be lugging around two launch pads. I have been looking all over the web for some ideas for about a week.

Well my search ended when I stumbled across this site (www.launchpad.hofle.com) that offered free plans for constructing a launch pad for $20. I was skeptical at first but after reading through the well detailed and easy to follow plans I decided to give it a try.

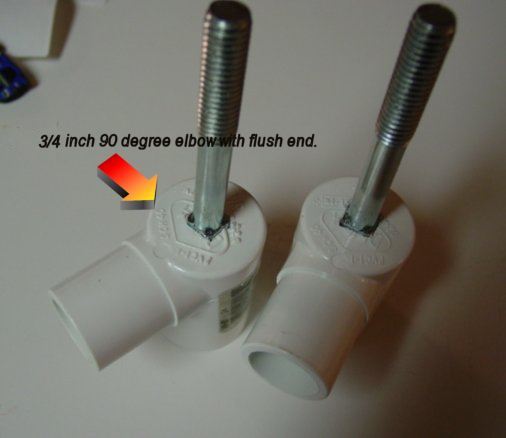
I printed off the shopping list that is on the site and went to Home Depot. I found everything on the list except the 90 degree elbows with the flat side so I tried Lowes but they didn't have it either. The web site gives you a suggestion for making your own and it worked fine. I used JB Weld to attach a washer to the cut off end of a tee fitting. All the parts without paint or the epoxy came to around $20 just like the site says.

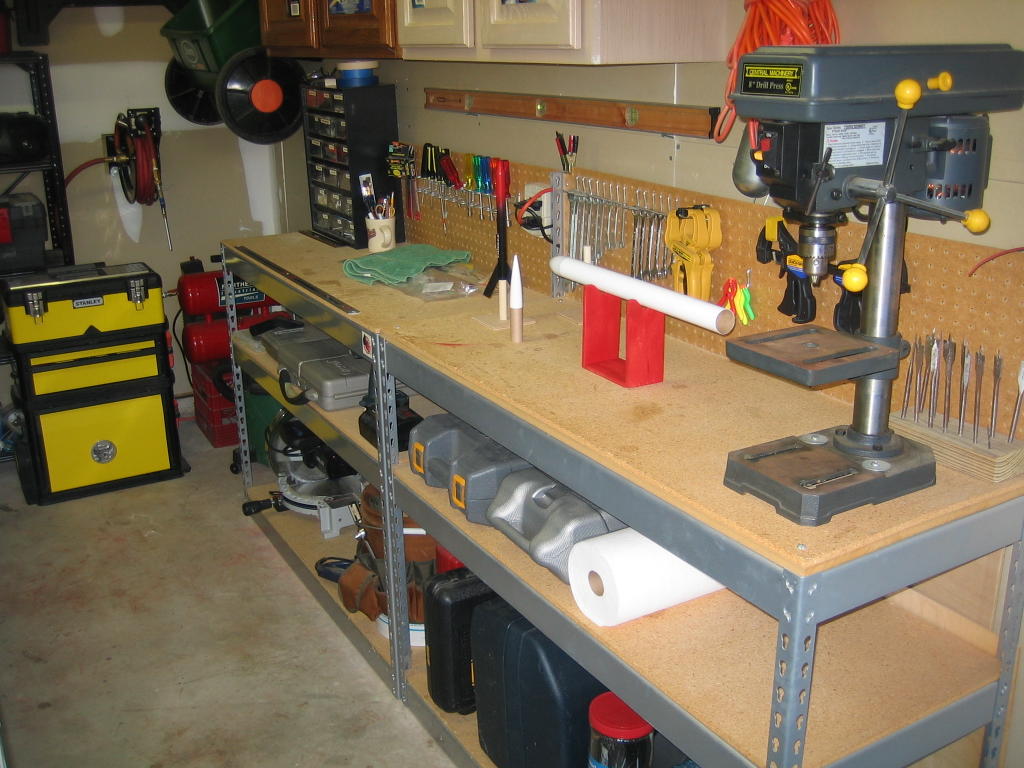
After getting all the supplies I headed to my workshop to get started. The instructions, pictures, and tips all made the entire project pretty easy. You do need some tools and mechanical common sense but overall anyone can do it. I was done with construction in about three hours. I painted it red to cover up all the ugly laser etched bar codes on the PVC.

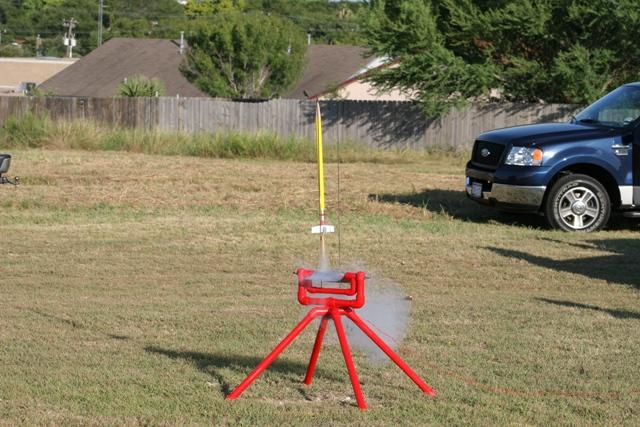
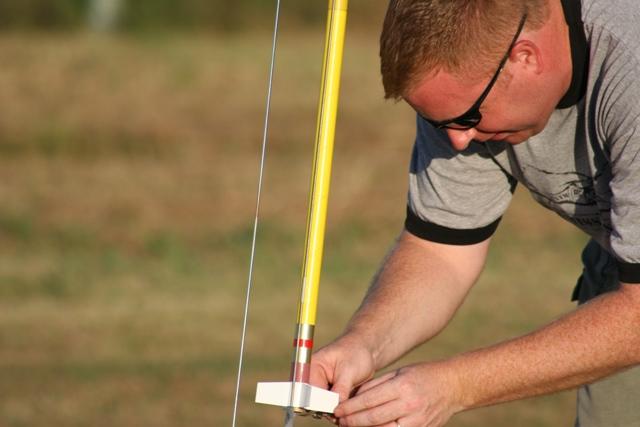
I took it out August 21st for a launch with some friends and it worked great. No more crawling on the ground for me. The base is rock solid and very easy to use. Everyone at the launch really liked it and I think a couple of them may build one of their own. I'm glad I decided on this launch pad to build and I am looking forward to many more launches with it. Hmmm...now all I need is a 12 volt launch controller.
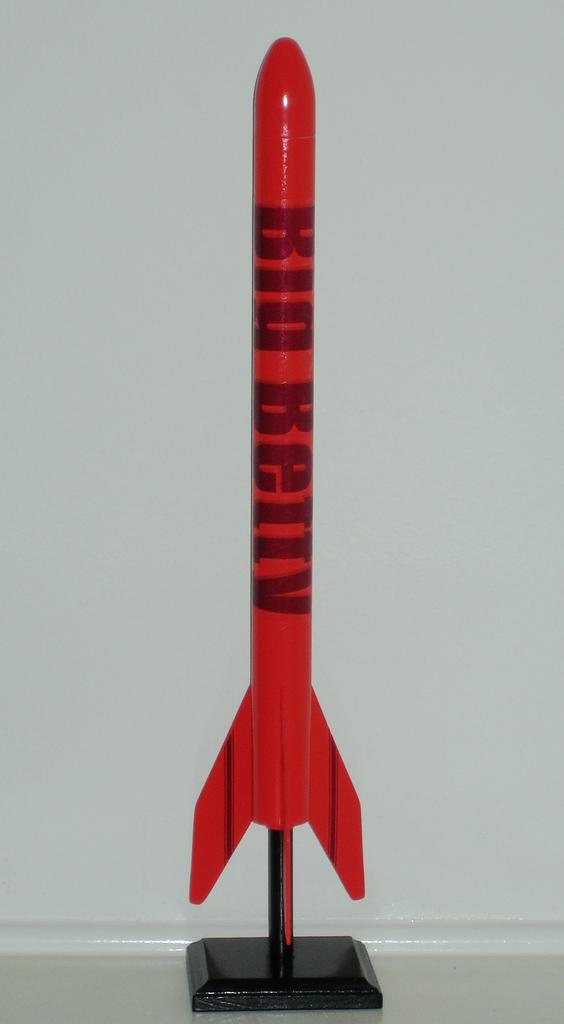
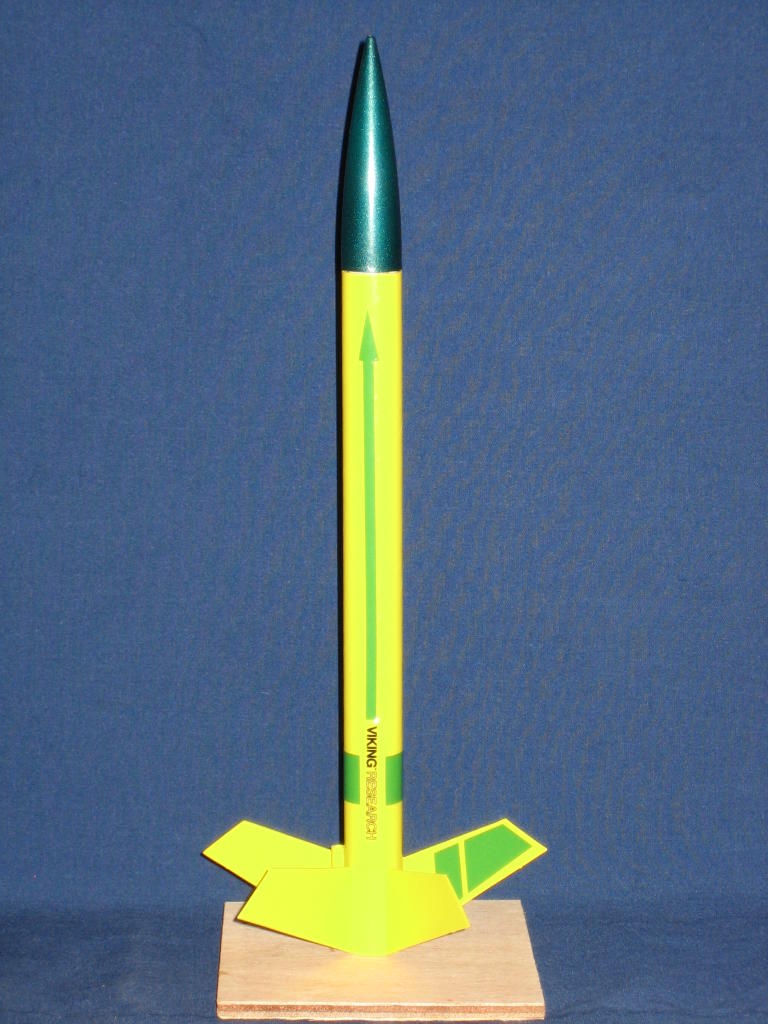
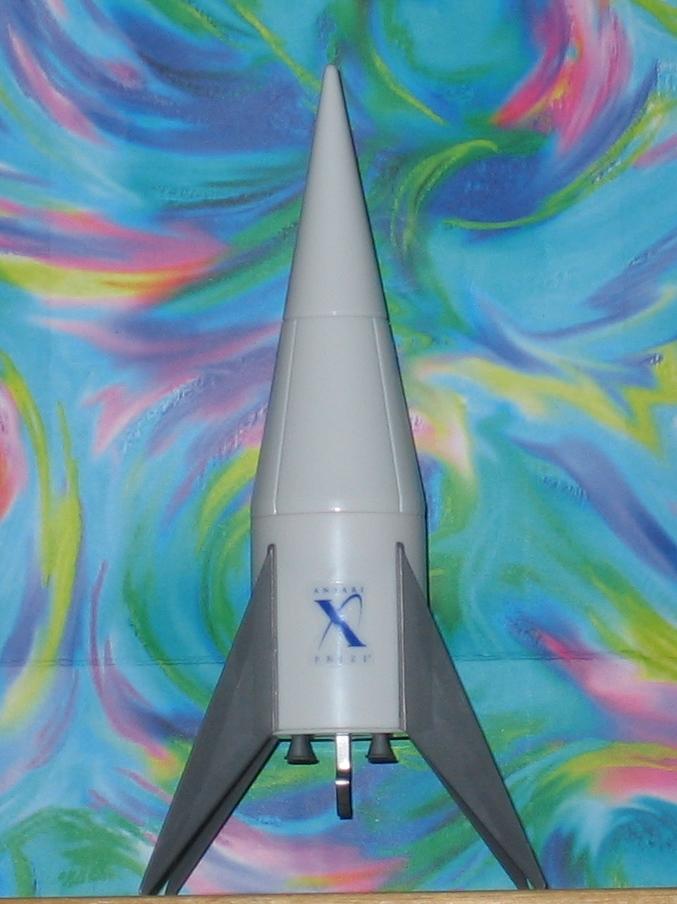
Sunday, August 21, 2005

Launch Report 8/21/05


We decided to go out and launch a few rockets this afternoon. It was a perfect day with hardly any wind and clear skies, the only downside is that is was almost 100 degrees outside. The launch area was in great shape because the grass was just cut a couple of days ago. My brother and father in-law, and a few friends all headed out for some fun around 6:30pm. The pictures were taken by my friend and "jack-of all trades" James, who owns Finer Works.

The first rocket we launched was the 001 Yankee with a new 2 inch paper streamer. I had read that this streamer was much more effective in slowing down the decent of the model but I could not notice a difference. After that was the maiden flight of the 006 Big Betty and the 007 Sky Writer. Both rockets flew perfectly, there were some problems with the landings though as noted in the launch log. The last rocket of the day was the 003 Viking which hit the street and broke a fin, but the damage is repairable.

The highlight was using my new launch pad that I made using the plans from a web site I stumbled across a couple of days ago. It worked great and it was nice not having to get on the ground to hook up my igniters. The pivot and the strength of the new pad was evident. It also looks really cool. You can build one for about $20 and the link to the plans are listed under "Downloadable Files".

Thursday, August 18, 2005

006 Big Betty

This is my first Quest model rocket. The big fins turned out really well on this model and so did every glue joint. However I learned that for a consistent smooth finish you must apply paint to the entire model in a very light quick fashion to maintain the "wet" look. I actually used an entire can of Testors paint on this model.

The paint finish aside, the rocket should be an excellent performer. I am disappointed with all the self stick decals I have come across so far and this one is the worst. I spent countless hours getting the finish perfect and the like an idiot I stuck this huge "sticker" right over it. It's big and difficult to get the air bubbles out. You can't really even see the finish under it.

I do like the way the kevlar shock cord mounts to the engine mount. The instructions and drawings in the plans were very good. The model is big and the name implies but is still pretty light and gets off the pad in a hurry. Overall it's a impressive rocket and turns out great flights.

Manufacturer - Quest
Stages - 1
Weight -
Length - 23 in.
Diameter - 1.576 in.
Fin Material - Balsa
Recovery - 12 in. Parachute
Current Status - Active

Monday, August 15, 2005

007 Estes No.2 Skywriter

The Skywriter is part of Estes E2X (easy to build) class of rockets. Even though this model does not represent much of a challenge to build I like the style of the thing. I mean a flying pencil, how cool is that, plus it was only $8.00. So the Skywriter gets the 007 designation in my fleet of model rockets.

Construction took less than one hour. I flew it with a B6-4 motor from Estes on it's first flight. It was the best flight from any rocket in my fleet. The rocket soared straight up and at apogee fired the ejection charge. The parachute deployed perfectly and gently lowered the rocket back to earth.

Manufacturer - Estes
Stages - 1
Weight - 1.5 oz.
Length - 26 in.
Diameter - .98 in.
Fin Material - Plastic
Recovery - 12 in. Parachute
Current Status - Active

A Word About Adhesives

I have done a little experimenting with adhesives since I started model rocketry and I thought I would share what I am finding to works the best.

General Purpose or White Glue - Elmers Craft Bond
This is the best glue I have ever used in general applications. It is easy to spread around out of the bottle and gets tacky in one minute. It will completely dry within one hour.

On Plastic - Elmers or Krazy Glue Craft Gel
I recently discovered that these are both made by Elmers. The actual Elmers brand is about half the price of Krazy Glue though. Testors Plastic Cement is what most kits call for but the drying time and adhesion is terrible. Superglue bonds anything I have tried it on including, wood, cardboard, plastic, cloth, and skin, oops! The disadvantages of this adhesive is the quick set time and you cannot take it apart to do it again. It will also permanently attach you to your model if you are not really careful.

On Wood - Titebond Regular Wood Glue
I have this but I rarely use it because it dries slow. This is a good glue for projects like stands and tools to build rockets, but not for actual rockets. It is really strong but dries slow and keeps it's yellow color when dry.

Sunday, August 14, 2005

Vanguard Rocket Takes To The Air


I launched my Vanguard Rocket for the first time today. I used a Estes B6-4 rocket motor. The model flew straight and deploy the recovery device perfectly. It sustained minor cosmetic damage on landing. The ground here is really dry and hard due to a really dry and hot summer.

I am pleased with the rockets flight but I am probably not buying any more of the Estes "Launhable" line sold at Wal-Mart. The model was especially cheap and without some really good body work looks bad when assembled. There is a two piece nosecone which when assembled leaves a seam that must be sanded thoroughly and then filled. There are so many very small intricate parts that are difficult to paint and firmly attach to the model (this is what sustained damage in flight). The fins are pieced together in a similar fashion.

Overall this model looks better on the stand than in the air.

Crash and Burn


I regret to report that project 005 Scissor Wing Transport has crashed somewhere in the weedy terrain surrounding my launch pad. The reckage was recovered and examined immediately. The cause of the crash was unstable glider fight due to a weight imbalance in the tail of the glider portion of the rocket.

Thankfully this was only a test flight of the completed but unfinished model. I will not attempt a rebuild of this rocket mainly because I don't see how this rocket could ever fly for more than a few flights. There are a lot of things that can go wrong with this model and it takes a long time to build and finish.

Saturday, August 13, 2005

Fin Jig


I got the idea for this fin jig from the book "Handbook of Model Rocketry" by G. Harry Stine. This is a great book with lot's of great ideas and little shop tools that you can make yourself. This jig holds the fin on almost perfectly straight. The only way to hold it on straighter while the glue dries is with a very complicated and expensive tool. It is a piece of 90 degree corner moulding with a 1/8 or 1/16 cut right in the middle. The effect is holding the fin steady while not touching the actual glue area. This prevents the jig from being glued to the rocket.

Friday, August 12, 2005

Model Stand


I soon discovered that storing models can be a real pain. I have stored them in my garage but was worried that I may knock them over or a strong wind may topple them unto the floor breaking a fin or chipping the paint. I couldn't put them inside because my tenatious cat may knock one over onto the floor giving my attack wiener dog a new toy to chew.

I decided to build a display stand (Fig.1 & 2). I have seen many in books and on other websites but never a materials list or simple plans on how to go about constructing a sturdy, practical, and universal display stand. It was clear to me that I would be on my own on this one. After all how hard could it be? Well as it turned out, not hard at all. Here's how I did it.

Materials From Home Depot
1 - 5/8 Diameter Hardwood Dowel 48" Long
2 - 1"x4" Hardwood Plank 24" Long
8 - 2" #6 Tapered Head Wood Screws
Wood Glue

Tools
Wood Saw or Miter Saw (Preferred)
Drill or Small Drill Press (Preferred) and 1/8" Bit
Tape Measure
Carpenters Square (Preferred) or straightedge

  1. Cut the dowel into 8 six inch pieces and sand the ends to remove the splintered wood.
  2. Wrap a piece of tape around the drill bit 1" from the tip.
  3. On one end of each dowel drill a 1" deep hole with the 1/8" bit in the dowel center, be very careful to drill straight down the center or your finished product will be crooked (I used a small drill press).
  4. Sand each plank to remove any splintered wood or rough edges.
  5. Measure from one end of the board 4.5", from your first mark measure 5", from your second mark measure 5", and from your third mark measure 5".
  6. Use the square or straightedge to draw a straight lines at each mark across the width of the board. (Fig.3)
  7. Measure to the center boards width (this is usually 1.75" because most 4" boards are really 3.5" wide) use a straightedge to draw the line down the entire length of the board.
  8. Drill 1/8" holes at each intersection line.
  9. Start a wood screw in each hole until the tip barely pokes out.
  10. Place a drop of wood glue on the end of the dowel with the hole in it.
  11. Line up the hole in the dowel with the protruding screw and tighten the screw down until snug (over torquing of the screw may split the dowel). Repeat for remaining dowels.
  12. Repeat above steps for second stand.
  13. Finish sand any remaining rough areas.
That's it, your new model stand is ready for immediate use! I hope this article was helpful to you. After building this project please post a comment about your experience.

Wednesday, August 10, 2005

First Launch


When it came time to conduct my first rocket launch I knew just the place. Right now my church has a big open field behind it. I guess it's 200 feet wide and 600 feet long. The only problem is that the grass was really high so I needed to cut it down. I measured a piece of rope 50 feet long and tied one end to a bolt that I pounded into the center of my soon to be launch area.

I jumped on the church's little John Deer riding lawn mower, grabbed the other end of the string and started cutting the grass. Because the other end of the rope was anchored into the ground I was able to cut a perfect 100 foot circle. It actually looks like a crop circle. It took a few passes but I eventually got the grass down to lawn length. I also cut a 10 foot circle 125 feet away from the actual launch pad location to measure altitude and track the rockets.

Even though the circle was only 100 feet, the minimum for "A" series rocket motors, there was plenty of room to launch up to "C" motors if you adjusted your launch rod for wind. That first day we did about three launches with small motors. A couple of days later we launched about 30 rockets of all sizes and shapes.

We launched in the morning and it was really still outside. It was a perfect day for a launch. Parents of the kids who built rockets started showing up about 7:00am and that's when we got started. The first rocket was a test flight to gauge the wind. It almost came straight down. After that we began launching two at a time and every rocket flew and came down perfectly. It was great and all the kids really had an awesome time.

Tuesday, August 09, 2005

Estes B6-4 Model Rocket Engine Test


I ruined the nozzle of a Estes B6-4 model rocket engine after test fitting it in my Vanguard rocket. It fit really well, and in trying to remove it I chipped the nozzle. I thought it would be cool to see what happens inside a rocket, what I discovered was very interesting. Click here to see the video.

004 Vanguard

The Vanguard stands over 15 inches high and looks great. I really took my time on this one and the finished product shows it. Unfortunately the model turns out awkward looking and short lived flights. This is due the much of the airframe being constructed of plastic.

Overall this was easy to build but tricky to finish and paint because of all the awkward plastic joints. The flights are not impressive and seem to be very short.

Manufacturer - Estes
Stages - 1
Weight - 3 oz.
Length - 19.5 in.
Diameter - 1.637 in.
Fin Material - Plastic
Recovery - 12 in. Parachute
Current Status - Active

003 Viking

I learned a lot on my first project and I believe my second model rocket turned out pretty good. It has a great base of racing yellow with a metallic green nosecone. On it's first flight I installed a Estes A6-3 motor and it flew wonderfully!

The biggest downside to this kit are the "fiber" fins which is code for cardboard. They are very flexible and start delaminating easily. You can configure the fins in about 50 different ways though.

Overall the rocket looks great and is very east to build. The airframe takes the paint well and is lightweight and very stable. This is one of the best fliers in my fleet.

Manufacturer - Estes
Stages - 1
Weight - .6 oz.
Length - 12.1 in.
Diameter - .74 in.
Fin Material - Fiber
Recovery - Streamer
Current Status - Active

002 NSA

This rocket came with my launch equipment but it's in the fleet so I thought I would add a picture of it.

Manufacturer - Estes
Stages - 1
Weight - 2.7 oz.
Length - 18 in.
Diameter - 1.35 in.
Fin Material - Plastic
Recovery - 12 in. Parachute
Current Status - Active

001 Yankee

This is the first rocket I ever built. It was fairly simple but did require that I use a template to cut the fins out. I have flown it with a Estes A6-3, and Estes C6-5 motors. Both flights were perfect but the rocket sustained some damage on landing after the second flight with the C motor. I can't explain why this happened as there was no damage to the recovery streamer.

Manufacturer - Estes
Stages - 1
Weight - .4 oz.
Length - 11 in.
Diameter - .74 in.
Fin Material - Balsa
Recovery - Streamer
Current Status - Active

Introduction

I started building model rockets in August of 2005 for a project with boys at my church. I thought it might be a good idea to build one before ordering 24 rockets for kids ages 6-12 to build. I got my first kit at Hobby Lobby, the Estes "Yankee". I didn't know what I was doing but I was excited to give it a try.

The first kit was a little more difficult than I thought it would be. I had to cut the fins out myself and glue them to the body tube. After doing all the cutting and gluing I was ready for some paint. I had some spray paint laying around and even though it didn't match the color on the package I thought it would look cool. The kit turned out looking pretty good. But would it fly? After all the work I had put into cutting, sanding, and painting I didn't want the model to blow up in the launch pad.

On Monday, August 1st 2005 the "Yankee" made it's maiden flight. The excitement of seeing the rocket I had built zoom into the air like one of it's big brothers made my heart jump. I heard the distinctive "foomp" of the ejection charge and my little rocket floated gently back to earth.

Needless to say I was hooked and I couldn't wait to get my next rocket and start building. After hunting around I found the best little store on the web for model rockets (see my links for the store). I ordered what I needed for the project and ordered one for myself too. I am looking forward to many more successful launches and lots more fun in model rocketry.