Model Stand
I soon discovered that storing models can be a real pain. I have stored them in my garage but was worried that I may knock them over or a strong wind may topple them unto the floor breaking a fin or chipping the paint. I couldn't put them inside because my tenatious cat may knock one over onto the floor giving my attack wiener dog a new toy to chew.
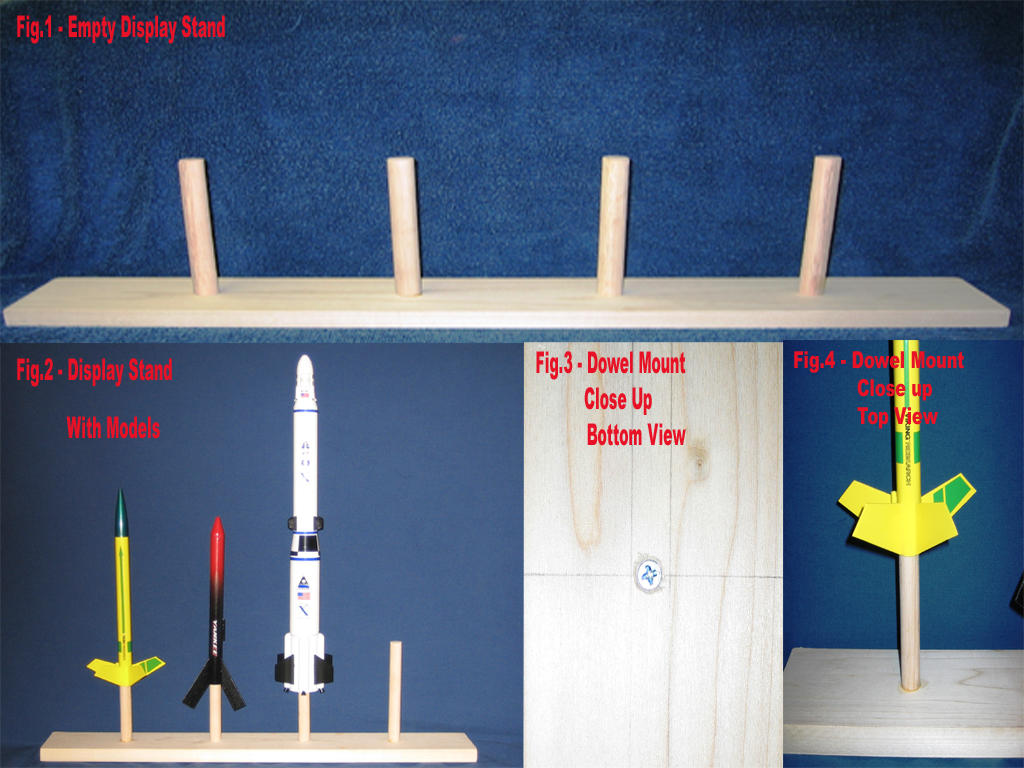
I decided to build a display stand (Fig.1 & 2). I have seen many in books and on other websites but never a materials list or simple plans on how to go about constructing a sturdy, practical, and universal display stand. It was clear to me that I would be on my own on this one. After all how hard could it be? Well as it turned out, not hard at all. Here's how I did it.
Materials From Home Depot
1 - 5/8 Diameter Hardwood Dowel 48" Long
2 - 1"x4" Hardwood Plank 24" Long
8 - 2" #6 Tapered Head Wood Screws
Wood Glue
Tools
Wood Saw or Miter Saw (Preferred)
Drill or Small Drill Press (Preferred) and 1/8" Bit
Tape Measure
Carpenters Square (Preferred) or straightedge
- Cut the dowel into 8 six inch pieces and sand the ends to remove the splintered wood.
- Wrap a piece of tape around the drill bit 1" from the tip.
- On one end of each dowel drill a 1" deep hole with the 1/8" bit in the dowel center, be very careful to drill straight down the center or your finished product will be crooked (I used a small drill press).
- Sand each plank to remove any splintered wood or rough edges.
- Measure from one end of the board 4.5", from your first mark measure 5", from your second mark measure 5", and from your third mark measure 5".
- Use the square or straightedge to draw a straight lines at each mark across the width of the board. (Fig.3)
- Measure to the center boards width (this is usually 1.75" because most 4" boards are really 3.5" wide) use a straightedge to draw the line down the entire length of the board.
- Drill 1/8" holes at each intersection line.
- Start a wood screw in each hole until the tip barely pokes out.
- Place a drop of wood glue on the end of the dowel with the hole in it.
- Line up the hole in the dowel with the protruding screw and tighten the screw down until snug (over torquing of the screw may split the dowel). Repeat for remaining dowels.
- Repeat above steps for second stand.
- Finish sand any remaining rough areas.
posted by Matt at 2:00 PM
![]()


0 Comments:
Post a Comment
<< Home